Getting started with your Deluxe Hosting web hosting services
Having a web presence is a must in today’s connected world. Whether it is a website to help sell your products or generate leads, to having your own domain based email address, Deluxe Hosting has you covered. Here is a quick guide to help you getting started with your Deluxe Hosting services.
Your Client Area
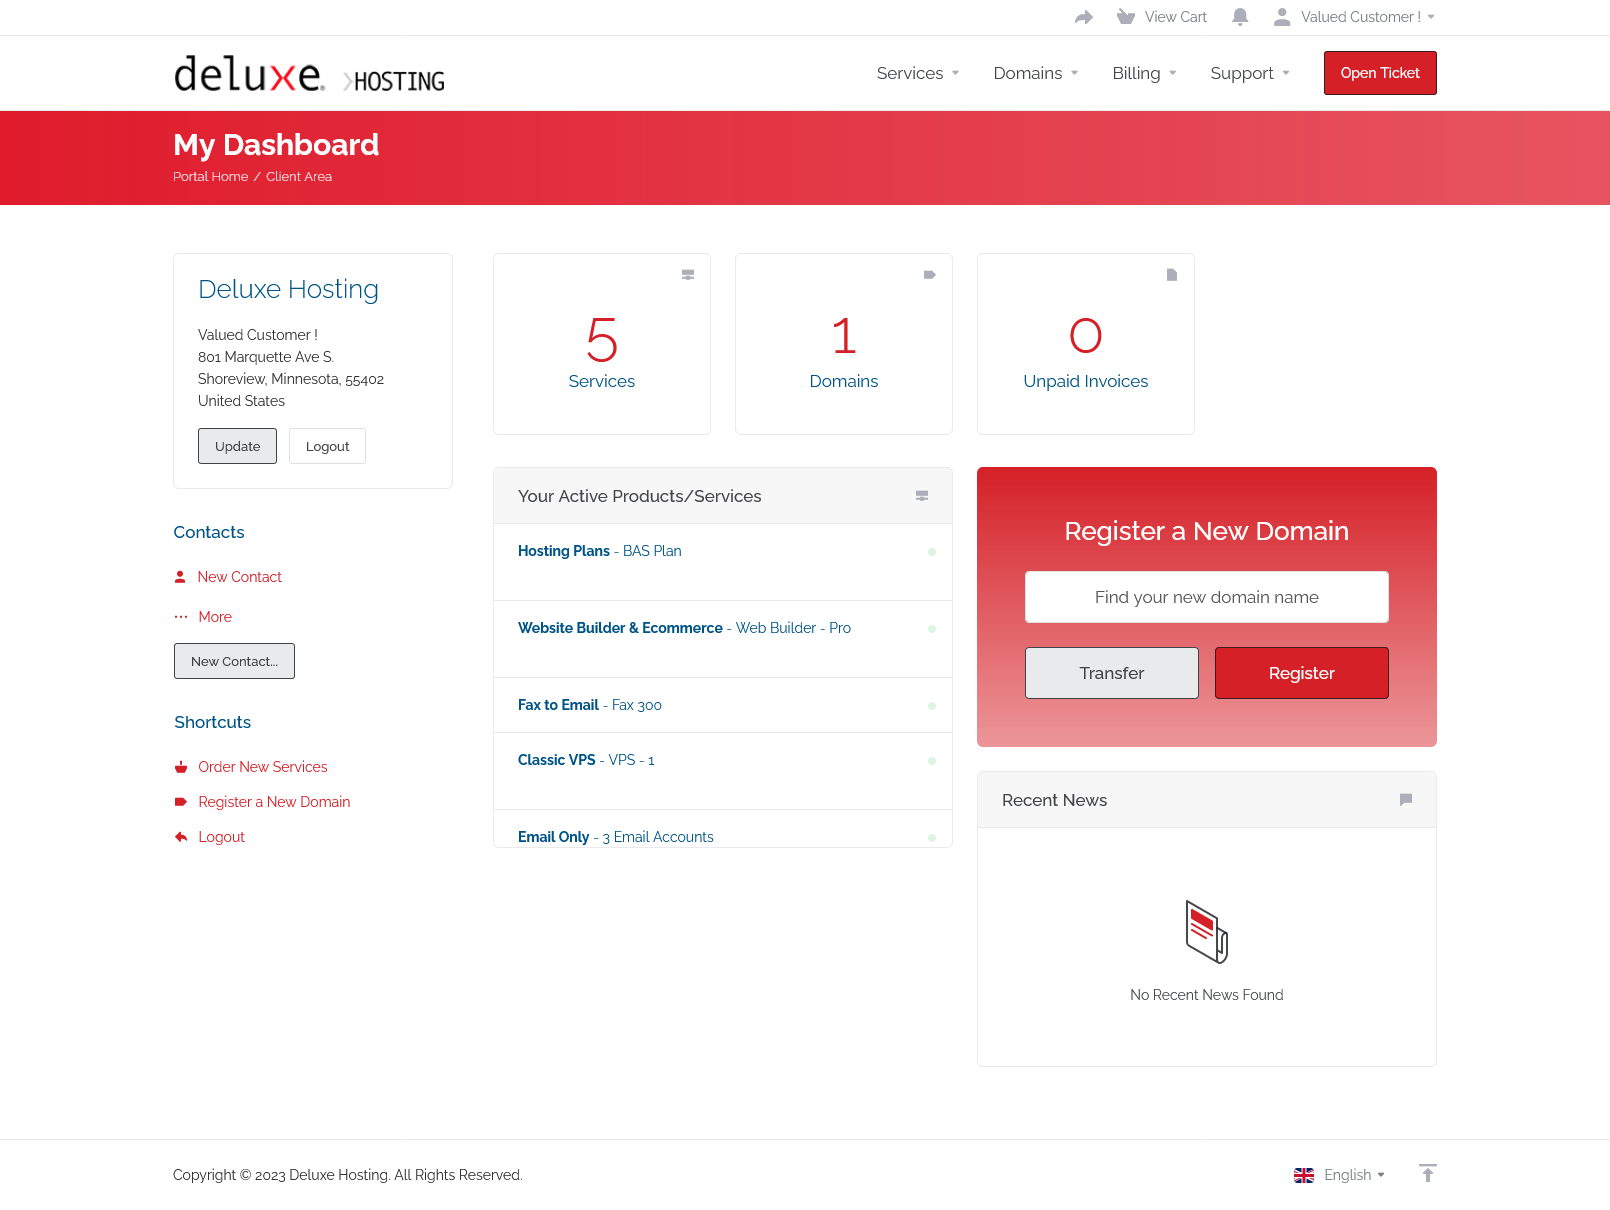
The first thing you will want to do when getting started with Deluxe webhosting is log into your client area and familiarize yourself with it.
If you do not know how to access your client area, you can find out here.

Your client area is where you manage all of your Deluxe Hosting services. From here you can access your services, upgrade services or purchase new ones. Take a look around and see what you find.
Once logged into your client area, you should check a few things.
- Check to make sure your contact information is up to date
- Make sure that your payment methods are set correctly
Now that you have your contact and payment information up to date, why not check out what else you can do in your client area.
- Pay an invoice or view and print old invoices
- Create a sub account to allow someone else to manage your services
- Access your existing services
- Manage your domains or purchase new domains
Accessing your Hosting Portal
Now that you have looked around your new client area, it’s time to check out your Web Hosting portal. While your client area is the main part of your Deluxe Hosting account, your hosting portal is where you actually create your websites or emails and where you can manage your other web hosting services.
Think of your client area as the administrative part of your account where the hosting portal is your creative part.
Which portal you use depends on what type of web hosting you purchased.

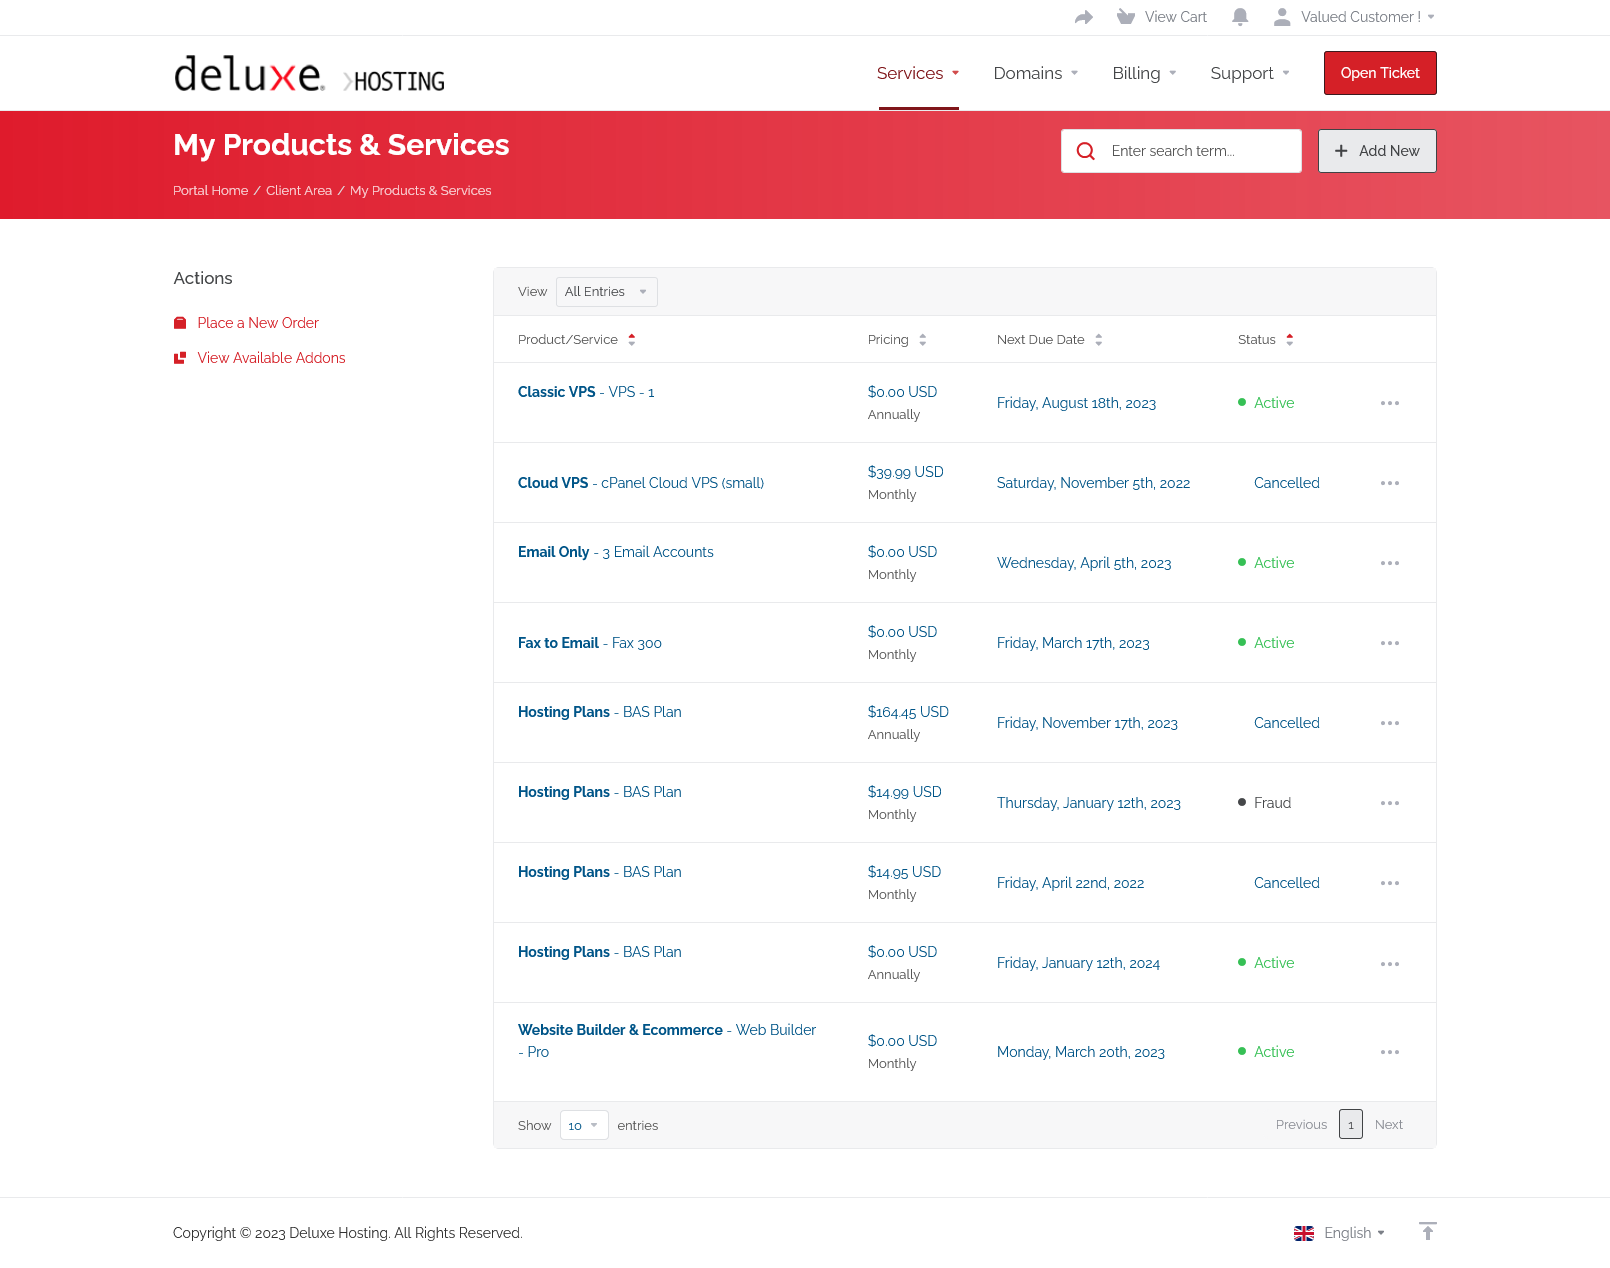
To access your services, you need to access your My Services page of the client area. You can do this by either clicking on the Services block in the center of the home page, or by choosing My Services from the drop-down menu after clicking on Services in the upper menu bar.

Once you get to the My Services page, you need to select the service by clicking on it (click anywhere on the bar, except the domain name, that will take you to the website).

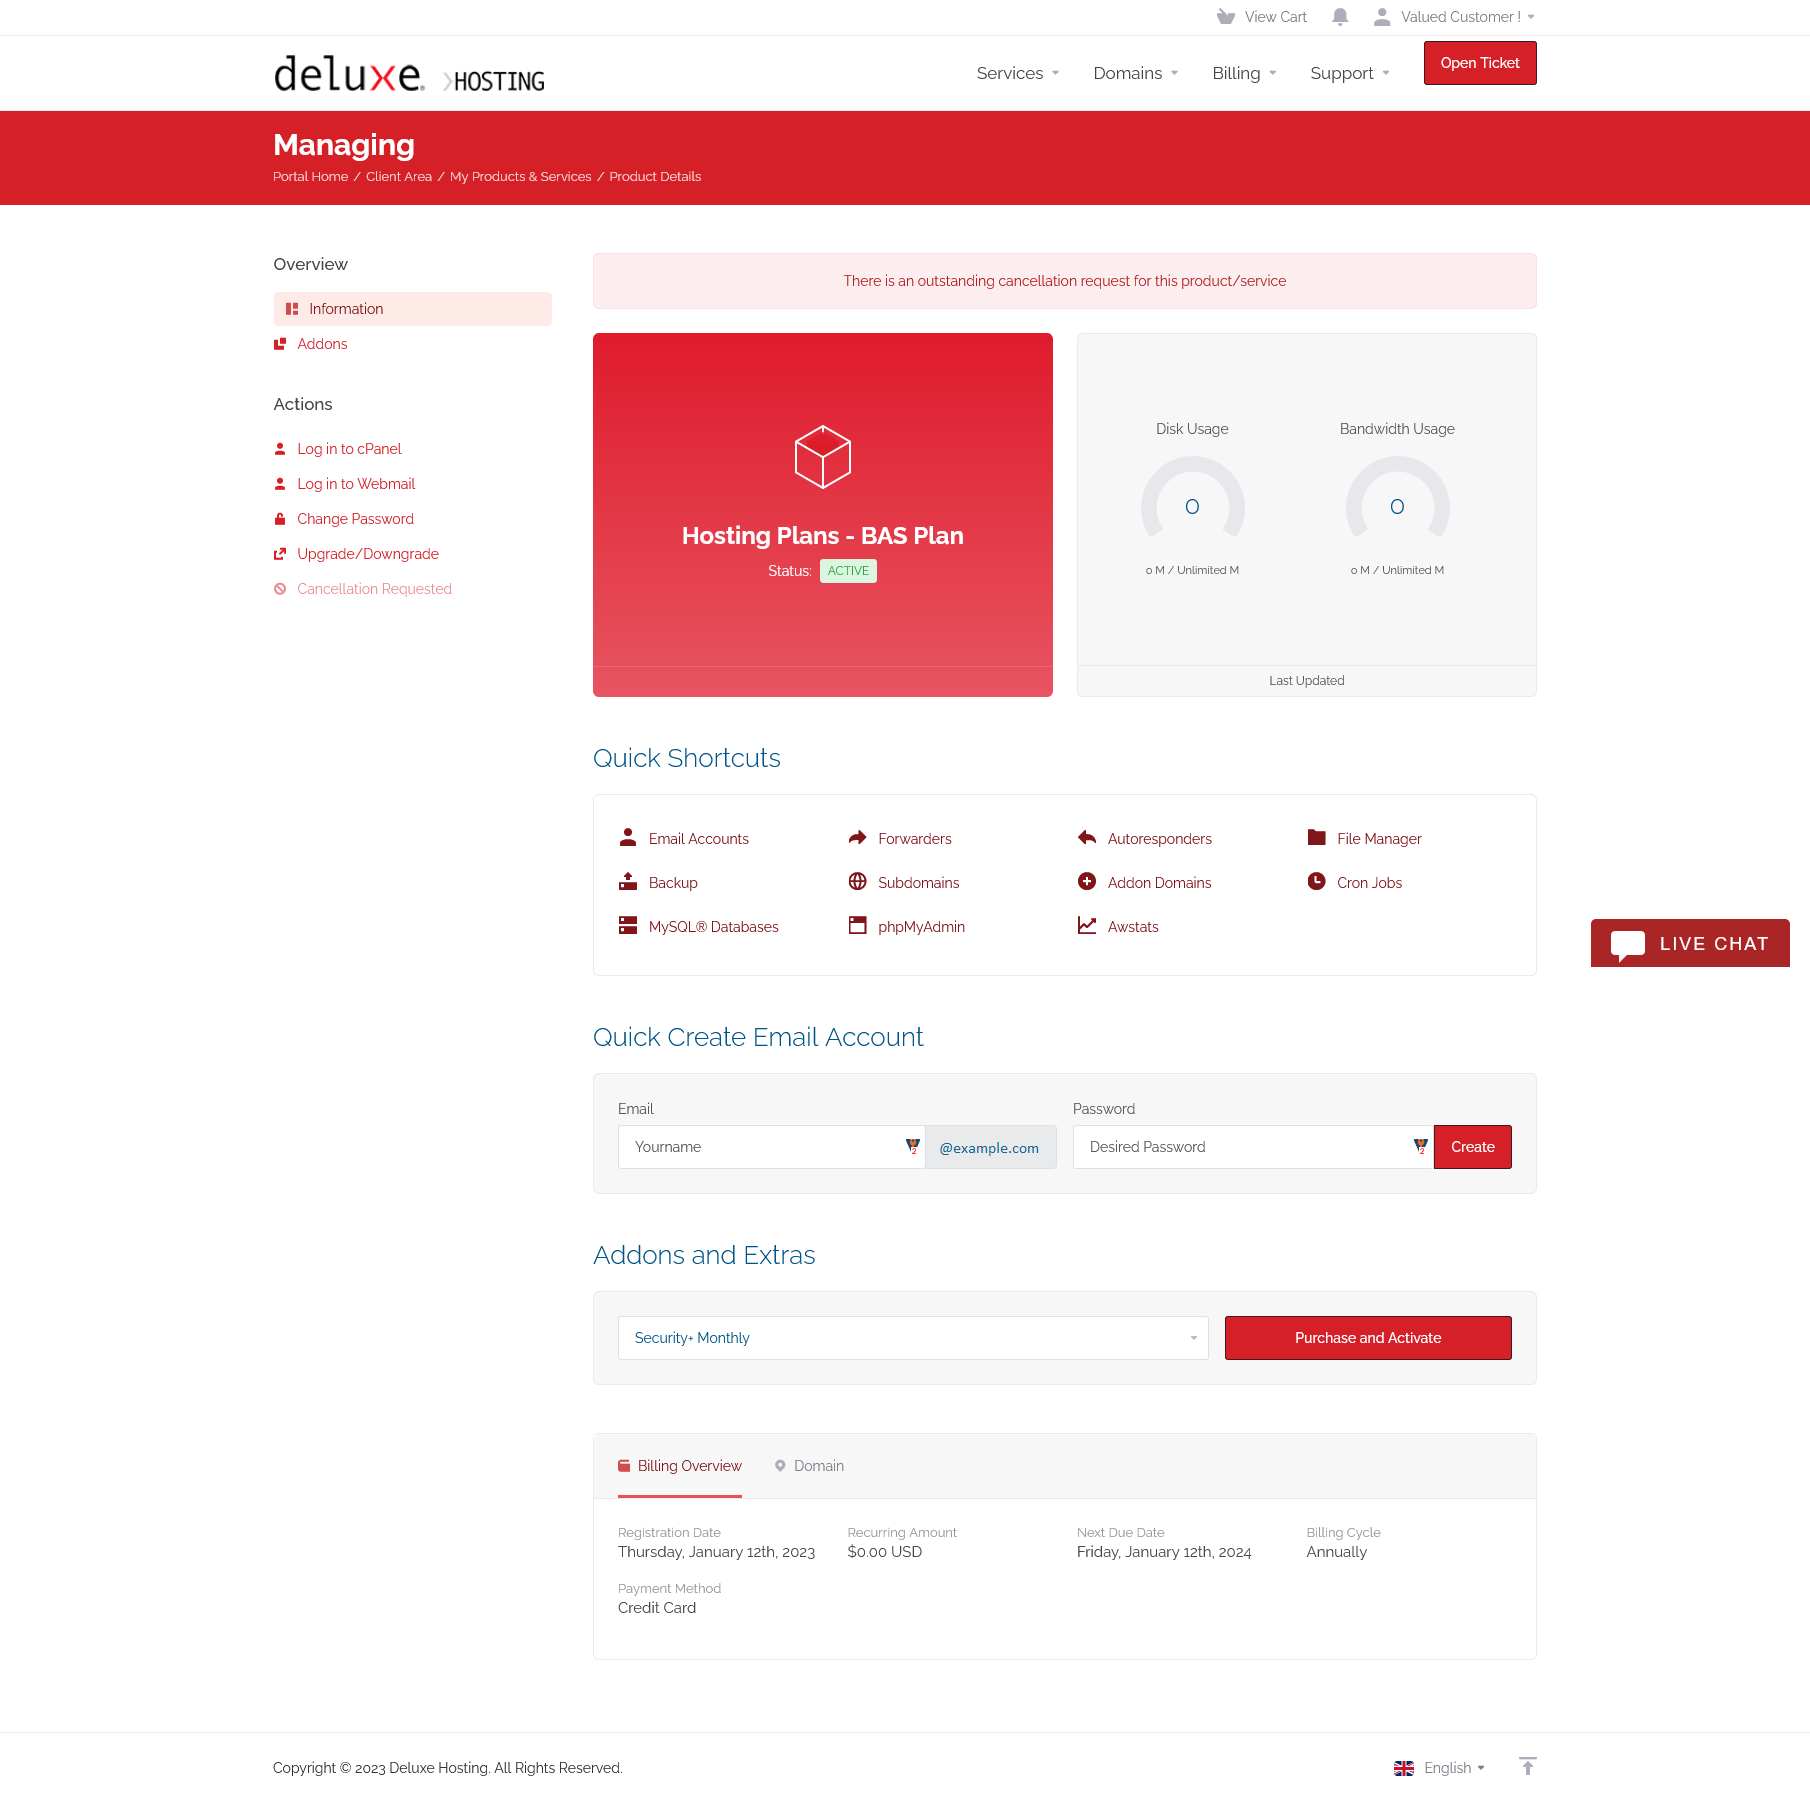
You will now be on the management page for that service. There is a summary of the service on the right-hand side of the page with several shortcuts and links.
On the left-hand side, there will be an Actions menu. In this menu, you will see an option to log into your service. You do not need the username or password for the service to log in this way.
cPanel Hosting
With cPanel based hosting, you can click on Login to cPanel to be transferred to your cPanel control panel. Click here for more information on cPanel.
Web Builder
If you purchased the Web Builder service, you can access it here to start building your website. Click here for more information on Web Builder.
Domain
When getting started with Deluxe Hosting services, the first thing you will need is a good domain name. Your domain name will be your address on the internet.
You want to choose a domain name that will be easy for your customers to remember and will identify your business. Customers should be able to see your website or email address and know instantly that it is you.
While it can be difficult (and expensive) to get the exact domain you want, you should be able to get a domain that works for you. If you can’t get the .com version of your domain (and you probably will not), you can try one of the other TLDs (Top Level Domain, for example, .com is a tld). There are too many options for TLDs than I can list here.
One thing to keep in mind is that your customers will need to remember this domain and recognize it as you, so you probably do not want to use randombusinessnumber54286.com. It also should not be too long either. No one would want to type in wowthisisareallylongdomainname.com.
I already have a domain name.
If you already have a domain name, you can use it with your new Deluxe Hosting services. Just see the below section on how to set up your DNS to point to our servers.
You may wish to transfer your domain to us to make managing your services easier. This is a simple process that is explained here. While this can be more convenient, it is not necessary.
I need to purchase a domain name.
You can purchase a domain name from us if you do not have a domain name already. Please check out this guide on registering a new domain name.
Domain Name System (DNS)
To use your new Deluxe Hosting services, we need to make sure your domain name resolves correctly, meaning, we need to make sure it’s sending your website traffic to your new server. The easiest way to do this is to set your domain name to use our name servers. While it is not necessary to use our name servers, it allows us to manage your DNS if any changes need to be made.
When you registered your domain with us, your name servers will be set up automatically, and you can go to the next step.
If you registered your domain elsewhere, you would need to visit that registrar and update your name servers to the ones shown below:
| Name Server | IP address | |
|---|---|---|
| Primary Name Server | ns1.deluxehosting.com | 207.55.253.5 |
| Secondary Name Server | ns2.deluxehosting.com | 207.55.253.5 |
If you need to keep your current site live until you are ready to switch to your new service, you can get everything else set up on your new server first, before updating your DNS. This way you can minimize or eliminate any downtime while you switch your DNS.
Note: It can take up to 24 hours for any changes or updates to your domain name and DNS to fully propagate and take effect. During this time your website traffic and email may be disrupted. If you want to minimize this disruption to your website traffic and email, before making any other changes to your name servers, lower your TTL with your current registrar. Once you lower your TTL, wait 24 hours, and then update your name servers. The change should now happen more quickly.
There are several online tools that you can use to test propagation, such as DNSChecker and Geopeeker.
This process typically completes within four to six hours, but allow 24 hours before the records are fully propagated.
Email Accounts
Now that you have your domain name and your DNS all set up, the next thing you will want to do is log into your web hosting account and create an email address. In most cases, this will be your cPanel account.
You can find a guide on creating an email account in cPanel here.
Now that you have your new email account with your own domain name, you can set up your new email address with a local email client such as Outlook or MacMail. You will need the following information to enter in your email client of choice:
- Username: your full email address
- Password: the password you just created
- Incoming
- Server type: IMAP or POP3 (you can use either)
- Mail server name: mail.example.com (replace ‘example.com’ with your own domain)
- Port number: 995 for POP accounts, 993 for IMAP accounts
- Outgoing
- Server type: SMTP
- Mail server name: mail.example.com (replace ‘example.com’ with your own domain)
- Port number: 465
You can check out here for guides on most mail clients.
Your New Website
Once you have your domain registered and emails all set up, the next thing you want is to set up a website. There are many methods of creating a website, too many to cover them all here. Your Deluxe Hosting web hosting service will support most Apache based web site builders.
Website CMS (Content Management System)
Included with your cPanel hosting is a service called Softaculous. This service will allow you to install a number of CMS scripts that you can use to build your website, such as:
- WordPress
- Joomla
- Concrete
- and many, many more
Even if you do not see the web site builder that you want to use in Softaculous, you can always install it manually, as long it is compatible with Apache web servers.
Local Website builder software
There are several offline website builder software options available that you can use to build a website. These software options allow you to build the your website locally (on your local computer), and then upload it to your web server.
If you have purchased website builder software (such as Rapidweaver), or you just like to build your website by hammering out code, you will need to set up an FTP account to upload your site files to the web server.
Creating an FTP Account
FTP, or File Transfer Protocol, is used to transfer files to and from your local machine (your computer) to the web server where your website is be stored. You can follow this guide on how to create an FTP account to transfer files from your local computer to our web server.
You will also need an FTP client that will be used to connect to the web server. There are many free and paid options available. Here are a few options available:
Using your new FTP account
With your new FTP account and your freshly installed FTP client, you are now ready to connect to your server and begin uploading your files. You will need the following information for your favorite FTP client. Or, if you are using an offline website builder, you will need to enter this information in that software.
- Server or Hostname: ftp.example.com
- replace example.com with your own domain
- if your DNS is not set up yet, you can use your server name or IP address
- Username: the username you created in the previous step
- remember to include the domain name (@example.com)
- Password: the password you just created
- Port number: 21 (this is the default port)
- Root directory: your domains document root folder (typically public_html/)
Note: You can use the IP address for your server instead of the domain name if your domain is not yet pointed to your server here. You can find your IP address in your cPanel. On the home page of the cPanel, you should see the summary on the right-hand side. In the General Information section, you should see the Shared IP address. This is your server IP.
If you are still having issues, and need further support, please reach out to our support team using any of these methods.
Recent Articles
What is Cloud Hosting
You probably have heard a lot of buzz around the internet about "the cloud". But what is the cloud that everyone is so excited about, and what does it have to do with your [...]
Website Builder Contact Forms
A Contact Form can be a powerful online tool to help build your business client base and add new customers.
Website Builder Site Settings
Use the Site Settings section of your Website Builder service to customize your new website.
Create your new website with Website Builder
Create your new website for your new business using our new Deluxe Hosting Website Builder service

