
Fax To Email

Sending faxes using a physical fax machine is so 90’s, yet some businesses still require them. Wouldn’t it be great if, instead of your faxes getting delivered to a large, expensive, toner-eating, tree-murdering machine, you would receive them in your email inbox? Why, then you could check for faxes while you are on the go without having to be chained to your fax machine when waiting for an important fax to arrive. It sounds like a dream…
Well, you are not dreaming. This is exactly what our Fax to Email service can do for you. Faxes sent to your fax number will be converted to a PDF file and sent to your email inbox for you to check anytime, anywhere. And not just receive faxes. You can also send faxes from your email address, or from our convenient portal. And, you don’t even need to pay extra for a fax number. A toll free number is included with the service.
Let us take a look at what Fax to Email is and how it can help your small business.
What is Fax to Email?
Fax to Email is exactly what it sounds like. When someone sends a fax to your toll-free fax number, you will receive a PDF file of the fax in your inbox, instead of a physical copy, printed out by a large, expensive and high maintenance fax machine using expensive toner on dead trees.
Besides saving you money on the fax machine, paper and toner, you can access your faxes from anywhere, without being tied to your office. You can easily keep your faxes organized as PDF files, or by using Fax to Email portal. If you do decide you need a physical copy of the fax, you can print them out at any time.
Another advantage of Fax to Email is security. As in, that important and confidential fax that you did not know was being sent is not sitting on your fax machine for anyone in the office to read. Our service can ensure that the only eyes that see your important faxes are your own.
You can send faxes from your Fax to Email number using your Fax to Email portal or you can use any email client.
How can I get Fax to Email?
If you would like to learn more about our Fax to Email service, check out our product page on our website. You can see what plans we have available there, or from your Deluxe Hosting client area.
If you do not know how to access your client area, you can find out here.

You can purchase this service from you client area as well, just as you can for any of our services. Once you are logged into your client area, click on the Order New Services link in the bottom left of the screen, in the Shortcuts menu.

Once on the Products page, select Fax to Email from the Categories menu on the left-hand side. You will now see all of the plans that we offer.
We offer plans based on your fax usage rates, which can be upgraded or downgraded as needed.
- 300 faxes/month
- 500 faxes/month
- 1000 faxes/month
All three are available in both Standard and Encrypted versions.
Standard
- Receive faxes to email from your dedicated toll-free number.
- Faxes are received as an attachment in 2 format types. (TIF, JPEG)
- Coverage across the U.S., Canada and the Caribbean.
- Access to the online fax portal.
- Storage of all faxes sent and received for up to 365 days.
Encrypted
- Faxes received are encrypted and only available via a secure link.
- Faxes are received as an attachment in 2 format types. (TIF, JPEG)
- Coverage across the U.S., Canada and the Caribbean.
- Access to the online fax portal.
- Storage of all faxes sent and received for up to 365 days.
Using your Fax to Email Portal

You can manage your account, faxes and users from your Fax to Email portal. You can access your Fax to Email portal at https://fax.faxwire.com/
Log in to your Fax to Email portal using your toll-free fax number and your password. You should have received an email when you purchased your service with your portal password.
Once you are logged in, you will be at your portal Dashboard. If this is the first time you have visited your Fax to Email portal, you will be asked to take the tour. This will give you a quick guide on how to use the portal.

You can skip the tour if you do not need it at this time. You can always run it later by choosing it from the drop down menu in the upper right-hand side (your Fax number and email address).
You will be brought to the Dashboard of you portal by default. You will see the navigation menu bar at the top-left hand side with four options:
Dashboard
If you want to send a fax, you can click on the Send Fax button in the upper left-hand side.
Below the Send Fax button, you will see a summery of your current account usage, displayed in four blocks.
Recently Received

In this block you will see a list of the last 5 faxes that you received. If the number is in your contact list, the name will be displayed, as well as the number.
Recently Sent

Here, you will see the last 5 faxes that you sent.
Outgoing Faxes

This block will show you any faxes that are currently in progress or have failed sending.
Usage Report

Here you will see a pie graph showing your current account usage. You will be able to easily see how many faxes you send and receive, and whether you may need to upgrade your plan.
Fax-Messages
This section is where you can manage all of your sent and received fax messages. This section will remind you of a webmail mailbox.

This section is divided into three columns:
On the far left-hand column, you have the Send Fax button and your mailbox folders.
- You can send a fax from this page by clicking on the Send Fax button.
- Clicking on your fax number will show you your mailbox folders (these function exactly as mail folders do)
- Inbox – incoming faxes
- Outbox – faxes currently being sent
- Sent – sent faxes
- Archive – store old faxes here
The left-center column will show a list of faxes that are in the folder selected from the column to the left.
At the top of this column, you will find the title bar. This will show the Select All checkbox and the current sorting method.
Checking the box will select all of the messages currently displayed (up to 100). Once any faxes are selected, the Options Menu will show above the title bar.
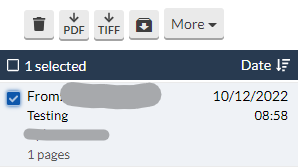
Using these options, you can:
- Delete the fax(es)
- Download the fax(es) as a PDF file
- Download the fax(es) as a TIFF file
- Send the fax to your Archive folder
- The More drop down will allow you to mark the fax(es) as Read or Unread
If you hover over a fax, you see buttons that will allow you to either delete or archive the message.
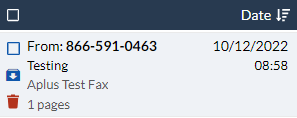
On the right-hand column, you will see the title and body of the fax message.
At the top, you will see the sender of the message. Clicking on the icon will add this sender to your contacts.
To the right, you will see the option to rotate the message, in case it was sent in the wrong orientation.
Below the title, you will see the fax.
Contacts
This section is where you can add and manage your contacts. Adding contacts will help you manage your faxes by assigning a name to the fax numbers in all of the other sections. This section is also divided into three sections.
In the far left-hand column, you can add a New Contact or search for a contact using the search box.
The left-center column will show the list of your contacts. If you hover over a contact you will see a select check box and a delete icon. At the top, above the title bar, you will see an option to import your contacts. This will require a CSV file (comma separated values). If you have a contact selected, you will also see a Delete button.
In the right-hand column you will see the contact information. You can also edit the contact here, just remember to click the Save button in the upper-right-hand corner once you are finished.
Preferences
Finally, the last section is your account preferences. Here you can set your contact information as well as other preferences. The left-hand column shows the different sections of the preferences. The right-hand side will show the available options.
General
This is your General settings for your account. Here you can select whether the system will send you notifications to your email address when faxes are received or when they are deleted automatically after their expiry period. You can also set your language and time zone.
Cover Page
Choose the layout of your cover page here and choose whether a cover page is used when sending faxes from your email address.
You will also want to add your contact information here. This information will be added to your outgoing fax cover letters.
Keyboard Shortcuts
Here you will find a list of keyboard shortcuts that you can use to navigate and use your Fax to Email portal.
Account Security
You can update your account password here. Enter your current password and your new password twice and click the save button.
Secondary Emails
If you have other users that will manage your faxes, you can add them here. You can also manage whether they can send or receive faxes. You can add up to 5 secondary emails.
Blocked Numbers
Using this section, you can block any nuisance faxes that you are receiving. If you are not receiving faxes from a particular sender, check to ensure that their fax number has not been added here.
Sending a Fax from your Fax to Email portal
When you click on the Send Fax button, whether you are on the Dashboard or in the Fax-Messages section, you will open the New Fax tool.

You will need a destination fax number and a file that you wish to send as a fax. There is also an option to send a cover letter.
- Destination fax number
- this is the fax number you are sending to
- if you have contacts set up, you can click on the + icon to the right and search and select the number from your contacts
- Cover Page
- Select whether you wish to include a cover page (this cover page will include the information you set in you Preferences)
- If yes, you will be asked to enter the following information of your target:
- Name
- Company
- Phone Number
- Address
- Subject
- Comments
- Add Files To Fax
- Add the files that will make up the fax
- This can include most image and text files, including PDF files.
- The file size limit is 10MB
Once you are done, click on the Send button in the upper right-hand side. You will be taken back to your Dashboard.
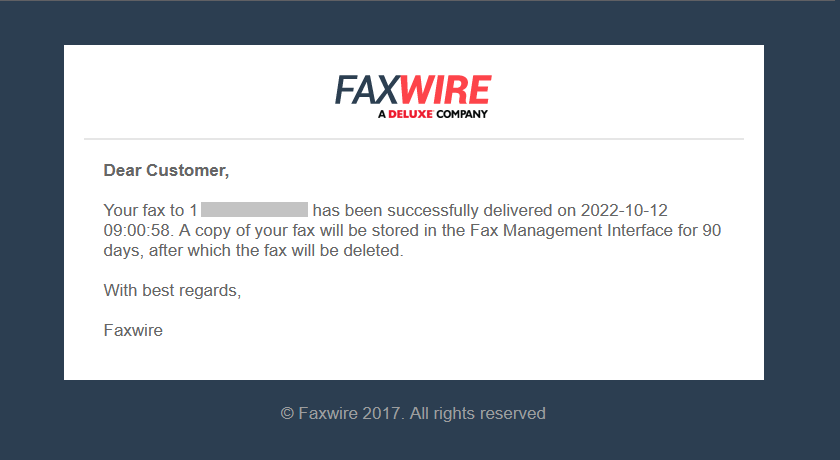
When a fax is successfully sent, you will receive a notification in your mailbox.
Sending a Fax from your Mail Client
You can send faxes using your Fax to Email service directly from any email client. While this may sound complicated, it is easier then you would think. You only need to understand how create the “To” address. You will need to send the message from the email account assigned to your Fax to Email service.
When sending a fax from your mail client, you will create the message just as you would with any email (make sure you are using the email address associated with your Fax to Email service). You must attach a PDF or text file to the email as this is what is faxed, not the body of the email. Once you have the email addressed and your attachments added, you just need to add the “To” address. But address do you send it to?
The email address that you use is formed from the target fax number, followed by our domain (fax.faxwire.com). For example, if you were sending a fax to 8775613520, you would enter 8775613520@fax.faxwire.com in the To field.
This will tell our service to send the attached files as a fax from your account (this is why it must be sent from the same mailbox as the one on file) to your target fax number. This message will be available for tracking in your portal once sent.
This functionality comes in handy when you are away from your desk and receive a fax that you wish to forward to another fax number. All you need to do on your mobile device is download the PDF from your received fax, and send it to your new target as an attachment.
When a fax is successfully sent, you will receive a notification in your mailbox.
Receiving Faxes
When someone sends a fax to your Fax to Email fax number, you will receive an email at your main mailbox, as well as any secondary account you have added.

You can download the fax to view. As you can see here, it was attached as a PDF file. You can also see that it will be stored in your Fax to Email portal for 30 days. After that time, it will be deleted from the portal. You can log into your portal anytime be for the 30 days to view, download or delete the fax.
If you are still having issues, and need further support, please reach out to our support team using any of these methods.
Recent Articles
What is Cloud Hosting
You probably have heard a lot of buzz around the internet about "the cloud". But what is the cloud that everyone is so excited about, and what does it have to do with your [...]
Website Builder Contact Forms
A Contact Form can be a powerful online tool to help build your business client base and add new customers.
Website Builder Site Settings
Use the Site Settings section of your Website Builder service to customize your new website.
Create your new website with Website Builder
Create your new website for your new business using our new Deluxe Hosting Website Builder service