Creating a website database dump file
If your website requires a database to function, you will need to database back up it as well, referred to a dump file. While creating database back ups may sound intimidating, luckily cPanel gives you an easy method of creating database dump files, all thanks to an app called phpMyAdmin.
Here is a quick guide on how to create a database dump file and how to import an one into your Deluxe hosting web hosting account.
What is a website database?
Many Content Management Systems (CMS), such as WordPress or Joomla, store most of your website content is a database, rather than in basic website files. This is for many reasons, but mostly because databases excel at managing large amounts of data, while still allowing them to be easily searchable and updated. There are also security benefits to using a database to store your website data.
Databases are similar in concept to an spreadsheet, such as MicroSoft Excel or GoogleSheets. Where spreadsheets have sheets, rows and columns, a database has tables, rows and columns. This creates an organized set of information that can be easily searched, referenced and updated. Databases are wrote using a programing language called SQL (pronounced sequel).
If your website requires a database to function properly, then you will need to create a database dump file or back up any time you are creating a back up of the website files. With most database CMS, the actual site files are fairly generic, while all of your website content is stored in the database. Because of this, just having a back up of the site files will not do you any good.
There are several methods of creating a back up of a database. While most methods may sound scary to a casual user, we can use the phpMyAdmin app in cPanel to do most of the heavy lifting for us.
Accessing phpMyAdmin
In order to access your phpMyAdmin app, first you will need to log into your cPanel. You can find a guide on how to access your cPanel here.

Once you are in your cPanel, scroll down to the Databases section and click on the phpMyAdmin app.
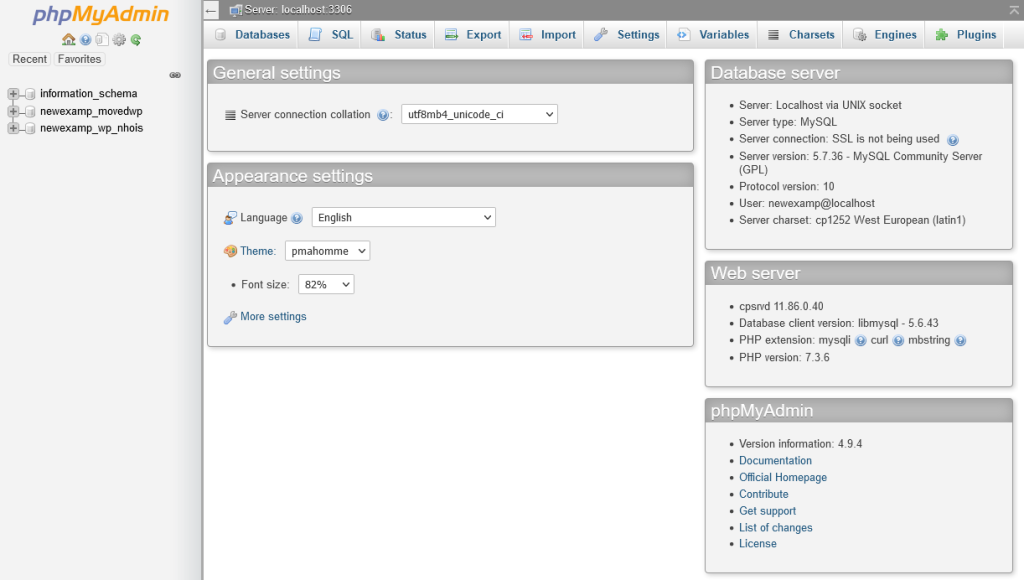
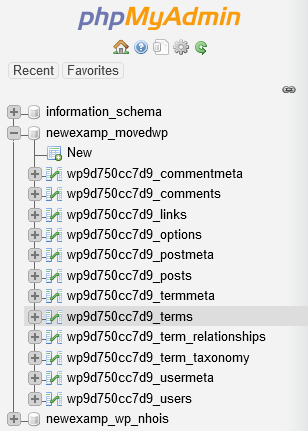
On the left-hand side of the screen, you will see your current databases. You can click on the + icon to the left of each database to view the tables for that database.
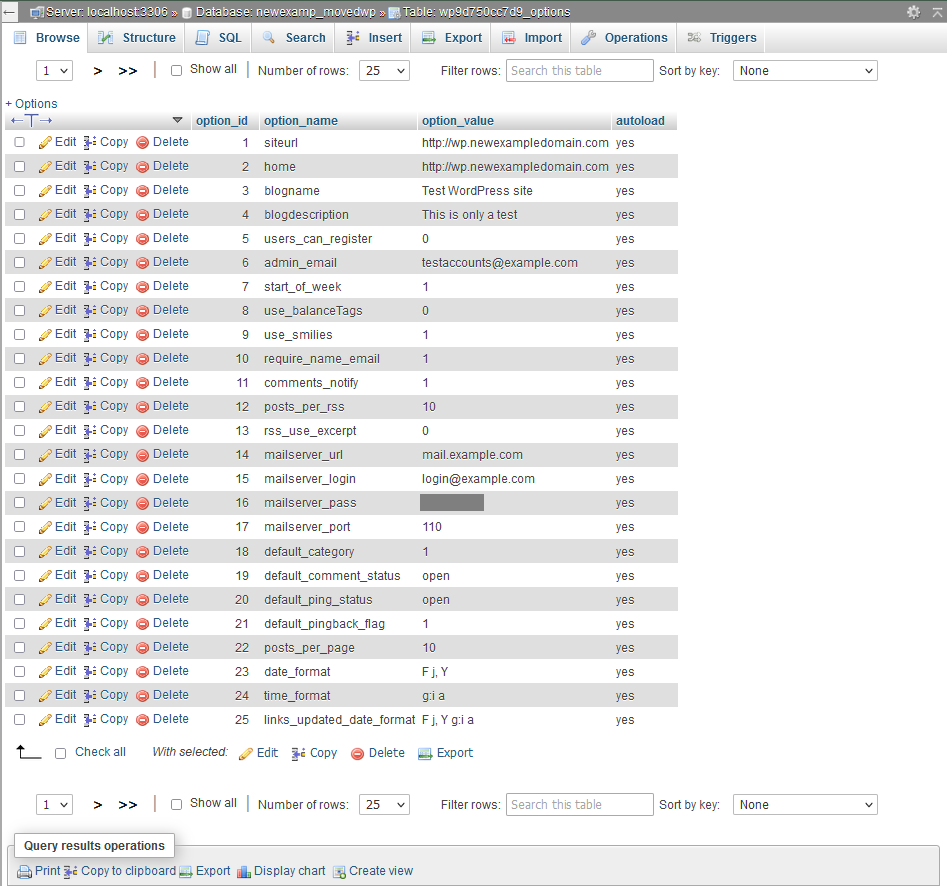
Clicking on a database on the left-hand side will load the tables in the right-hand side. You can manage and modify your database on the right-hand side.
Clicking on a table on either side will open the table on the right-hand side for editing.
Editing databases in this method can be difficult and errors can break your website entirely, so it is best to not make edits unless you are certain.
Creating and Exporting a Database Dump File
Now that you are familiar with the phpMyAdmin interface, lets use it to create a back up of your database for safe keeping. This sounds like it will be really complicated. In fact, it is not difficult at all.

Once you select your database on the left-hand side of the screen, at the top of the right-hand side of the interface, you will see the menu bar. On this bar, you should see the Export button. Click this to start.
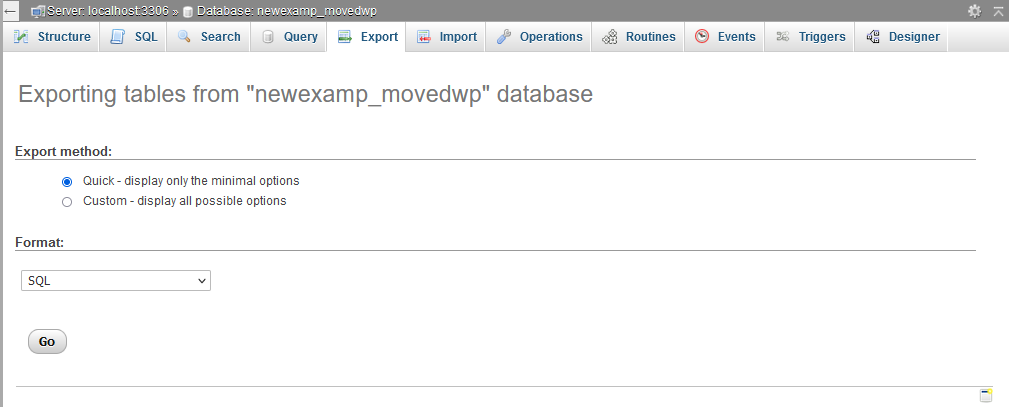
You will now see the option screen for creating an export or dump of the database.
Export Method
At the top, you can choose your export method. The quick option should work fine. If you choose the custom method, you will see more options to choose from, but these are beyond the scope of this guide.
Format
You can also choose the format of the exported file. Once again the default (SQL) should be fine.
Now click Go to start the database dump. Once the export completes, the file download prompt for your browser should open. Choose a location on your local machine to save the file and click save.
Congratulations! You now have a back up of your website database. I told you it was easy.
Importing a Database Dump File
While not as easy as exporting a database, you can also import your database to your web hosting server if you are having issues with your website due to updates, hacks or errors. But before importing, you will need to remove the current tables from the database first. Before removing the tables, you should create a back up of the current database, even if the site is not working currently, just in case.
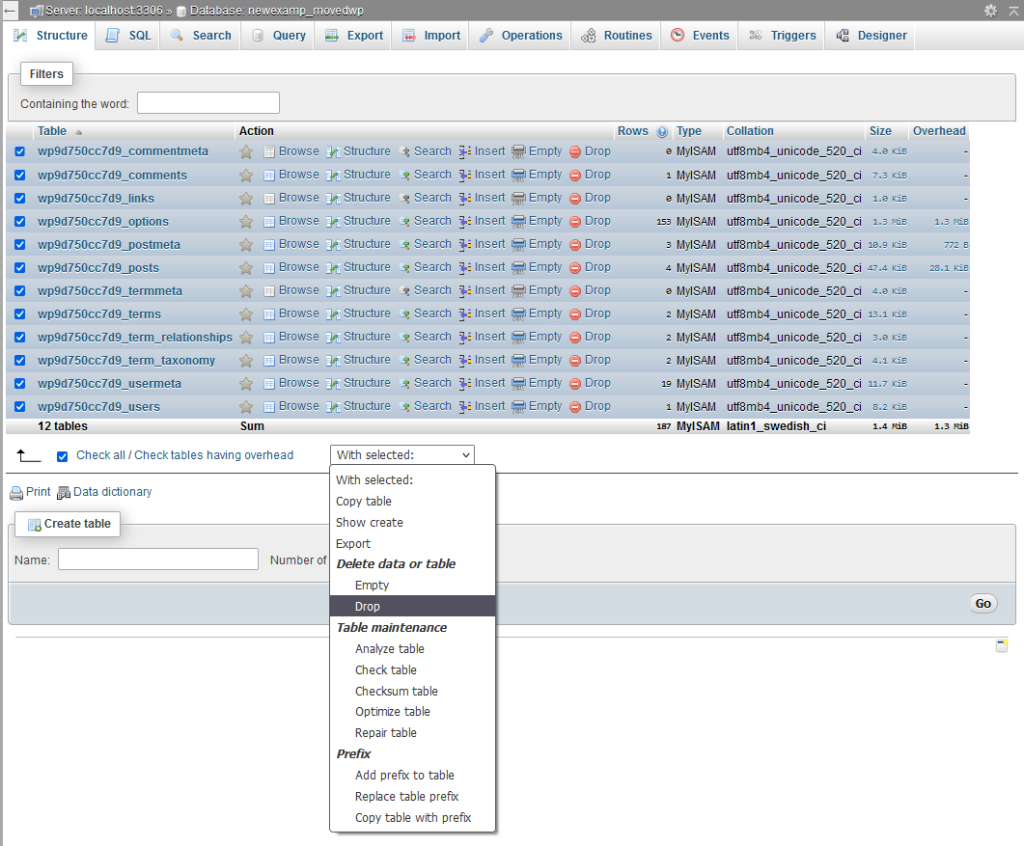
Dropping the current tables
To delete the current tables, first click on the database in the list on the left-hand side. This will load the tables in the right-hand side.
Once the tables are all loaded, you should see an option at the bottom of the list that will allow you to select all of the tables ( / Check tables having overhead ). This will check the selection box to the left of each table.
Now, click on the drop down menu to the right of the / Check tables having overhead link. From this menu, select Drop (this is MySql talk for delete).

You will now need to confirm that you wish to drop all of the tables. Click on Yes to confirm. The database should now be empty of tables.
Importing the new tables
Now, you can import your new tables into the database from your back up. Shockingly, this is done by clicking on the Import button in the top menu bar.
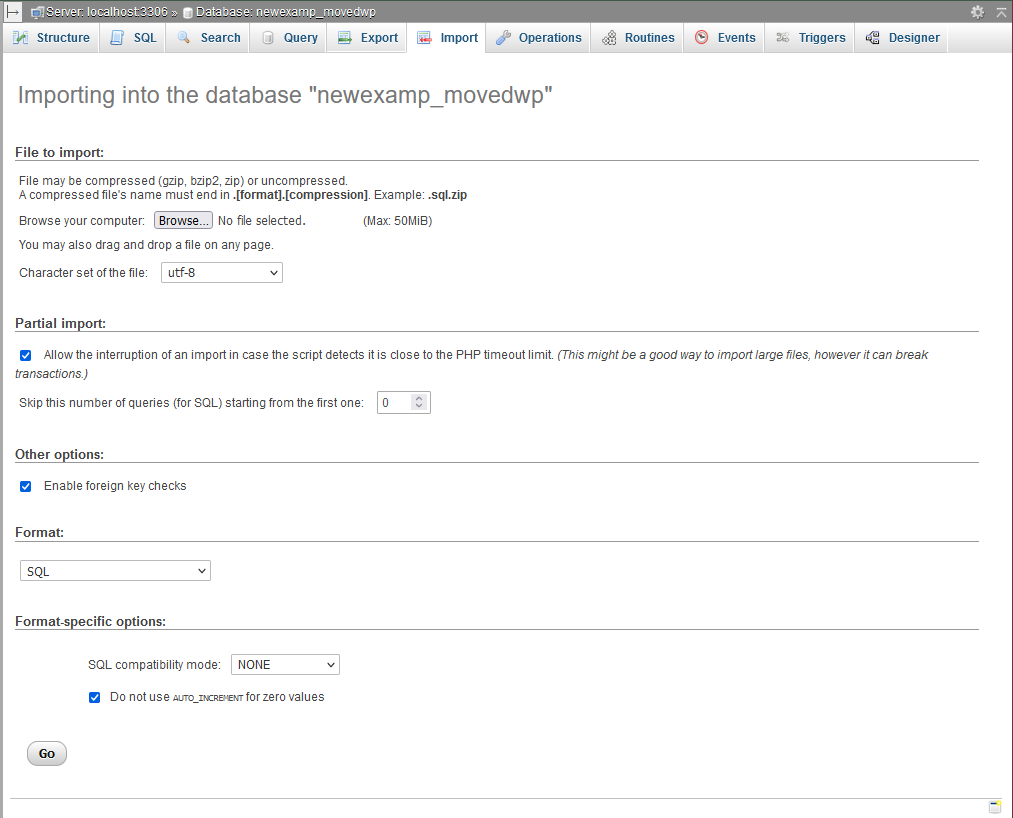
There are several options when importing your database tables. The default settings should be fine.
File to Import:
Here you will choose what file to import. Click on the Browse… button and choose the file on your local computer that you wish to import. This should be a .sql file. The character set should be left at uft-8.
Partial Import:
Check this box if your database is very large. This will protect from server timeouts while importing.
Other Options:
should be checked, unless you are having issues importing the tables.
Format-specific options:
These options should only be modified if you are having issues importing your tables.
Once you are good with the settings, click Go to begin importing your tables. Once the import is completed, you will get a confirmation message that the files were imported. Click your database to see your tables are back.
You should now check your website to see if it is loading correctly.
If you are still having issues, and need further support, please reach out to our support team using any of these methods.
Recent Articles
What is Cloud Hosting
You probably have heard a lot of buzz around the internet about "the cloud". But what is the cloud that everyone is so excited about, and what does it have to do with your [...]
Website Builder Contact Forms
A Contact Form can be a powerful online tool to help build your business client base and add new customers.
Website Builder Site Settings
Use the Site Settings section of your Website Builder service to customize your new website.
Create your new website with Website Builder
Create your new website for your new business using our new Deluxe Hosting Website Builder service

