Adding New Users and Contacts
There are several reasons that you may want to add contacts and additional users to your Deluxe Hosting client area. It could be that you wish to grant access to your account to other parties, such as your technical support team. Or maybe you have a separate billing address that you need to have on your invoices.
You can set up new users in your Deluxe Hosting client area. Here is how.
Accessing the Contacts/Sub-Accounts
To add a new contact or user to your Deluxe Hosting client area, you will first need to log into your client area.
If you do not know how to access your client area, you can find out here.
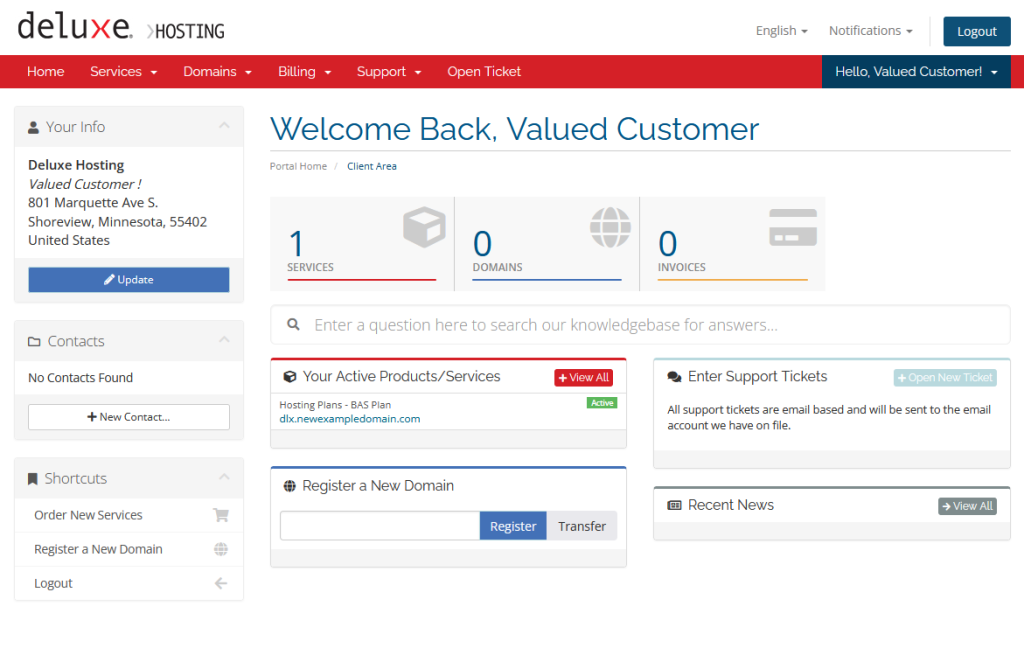
Once you are logged into your client area, you will see your contact information in the upper left-hand side of the screen. Under your contact information, you will see a button to Update your contact information. Below that button, you will see any additional contacts that you have set up on your account with a button labeled + Add Contact.
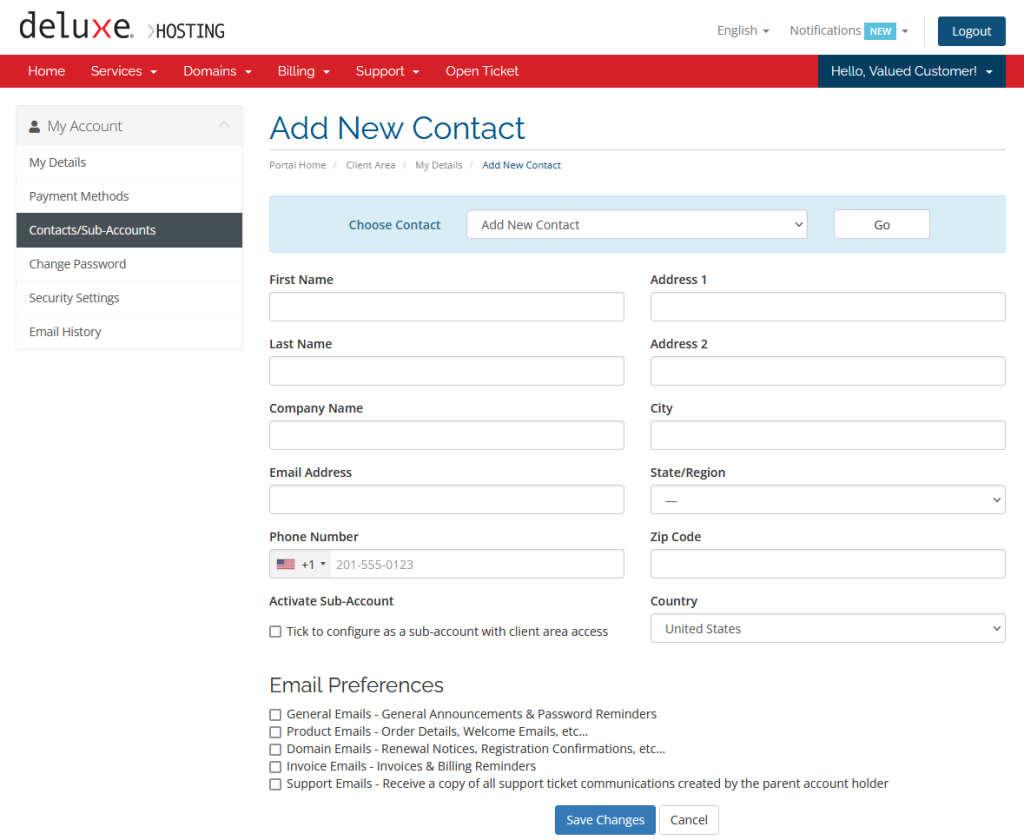
There are two methods to access the Contacts/Sub-Accounts page. First, you can the + Add Contact button below the list of Contacts. The other is by clicking on the Update button below your primary contact information and then clicking on Contacts/Sub-Accounts in the left-hand menu.
No matter which method you choose, you will now be on the Contacts/Sub-Accounts page.
Add a New Contact or Sub-Account
Now that you are on the Contacts/Sub-Accounts, you can create a new contact. Let us divide this into sections to make it easier to explain.
Contact Information
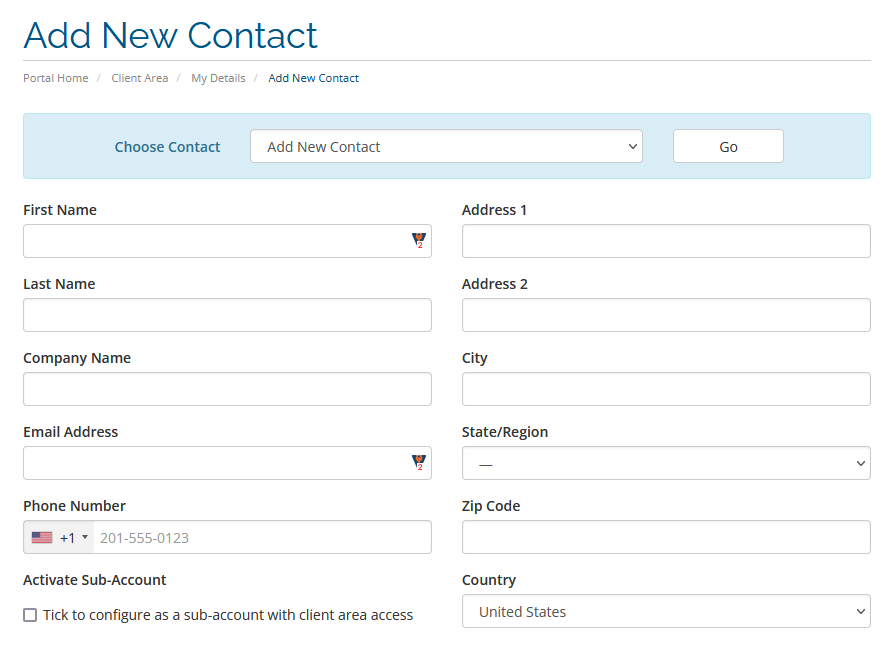
In the first section, you can choose whether you are updating a contact or you can choose to create a new account. Choose Add New Account and fill out the fields.
You will need to use a different email address for each account as this is what is used for the username.
There will be a check box at the bottom of the contact fields labeled Activate Sub-Account. If the account you are currently setting up is only for contact information and will not be used to manage your accounts and services, you can leave this unchecked. You will not be able to log in with this account. You can skip the next section and proceed to the Emails section.
Contact Permissions
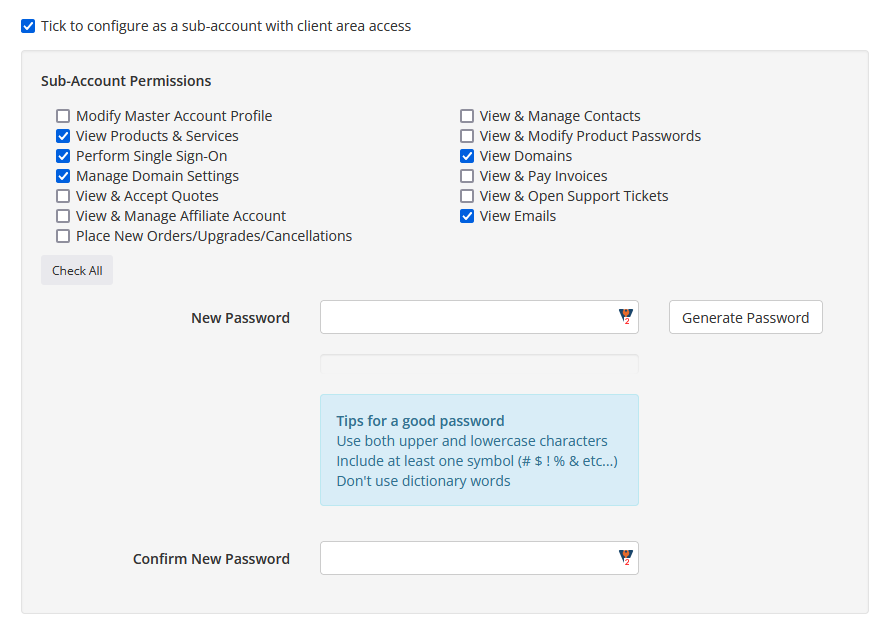
Here you can choose what parts of your client area this account will have access to. Choose to restrict the account to only be able to view services or access them without the ability to purchase or modify any. These options are selected by checking the corresponding check box for each section of the client area.
You will also need to set a password for this account. The password will need to be secure enough to fill the bar below the password field. Or, you can use the Password Generator to create a password for you, just be sure to copy it down.
This section will only show if you check the box labeled Activate Sub-Account.
Contact Emails

Finally, you can choose what emails this account will receive. Check the box next to the options you would like.
Once you are happy with all of your settings, click the Save Changes button to create the contact.
Edit a Contact
If you need to edit an existing contact or sub-account, you can do this from the Contacts/Sub-Accounts section as well. If you do not know how to access this section, see above.
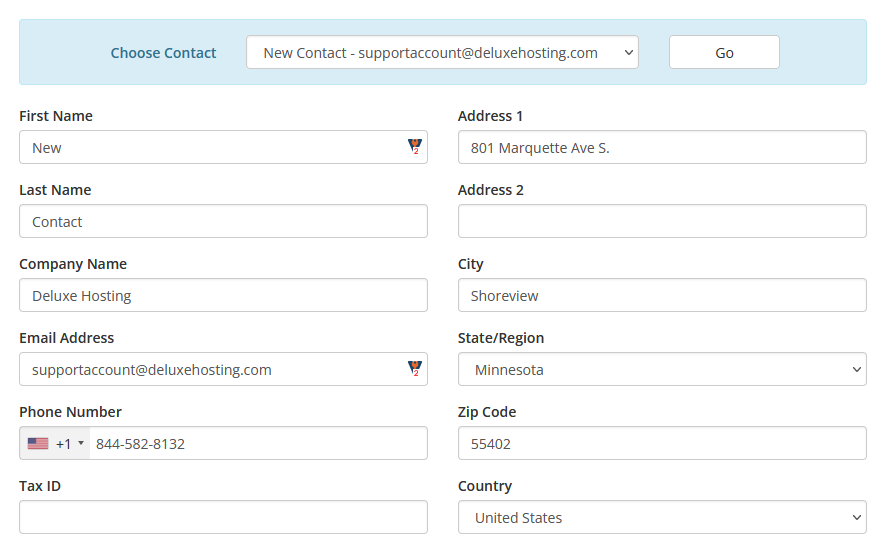
At the top of the screen, you will see a drop down menu where you can select which contact you currently have selected. Choose the contact you wish to edit here.
Now, you can edit any of the fields for that contact, including the password, permissions and emails. Just be sure to click on Save Changes once you are finished.
Delete a Contact
You can also delete any contacts that are now longer needed. This is good practice to help keep your account secure. Access your Contacts/Sub-Accounts section using this guide.

Choose the contact that you wish to delete from the drop down menu at the top of the screen.

Once you have the account selected, click on the Delete Contact button at the bottom of the screen.
Note: This action is not reversible, so ensure that the contact is no longer needed before deletion.
If you are still having issues, and need further support, please reach out to our support team using any of these methods.
Recent Articles
What is Cloud Hosting
You probably have heard a lot of buzz around the internet about "the cloud". But what is the cloud that everyone is so excited about, and what does it have to do with your [...]
Website Builder Contact Forms
A Contact Form can be a powerful online tool to help build your business client base and add new customers.
Website Builder Site Settings
Use the Site Settings section of your Website Builder service to customize your new website.
Create your new website with Website Builder
Create your new website for your new business using our new Deluxe Hosting Website Builder service

