How to setup Custom Name Servers
In some cases you will want to create your own custom name servers. This guide will explain how to do this from your client area.
Custom Nameservers
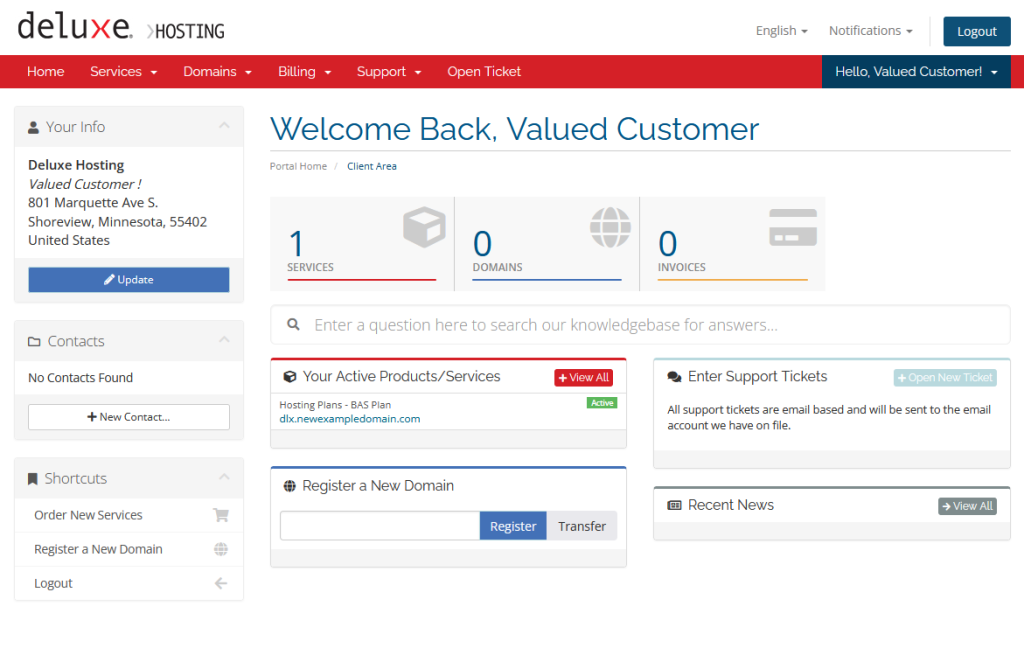
To create your own custom name servers, you first need to log into your Deluxe Hosting client area.
If you do not know how to access your client area, you can find out here.

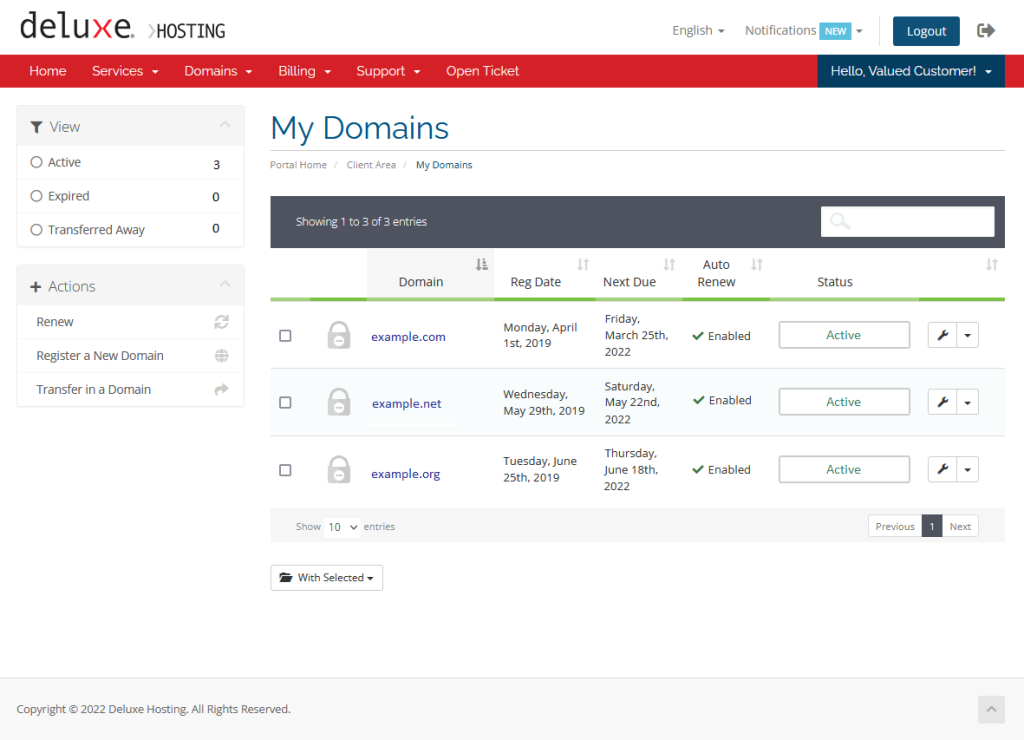
Now that you are logged into your client area, you can access your My Domains page. You can do this by clicking on the Domains block in the center section of your client area homepage. Or you can click on Domains in the upper menu bar and select My Domains from the drop down menu.

On your My Domains page, click on the bar for the domain you are working on. Click anywhere on the bar except the domain name (this will load the domains website).

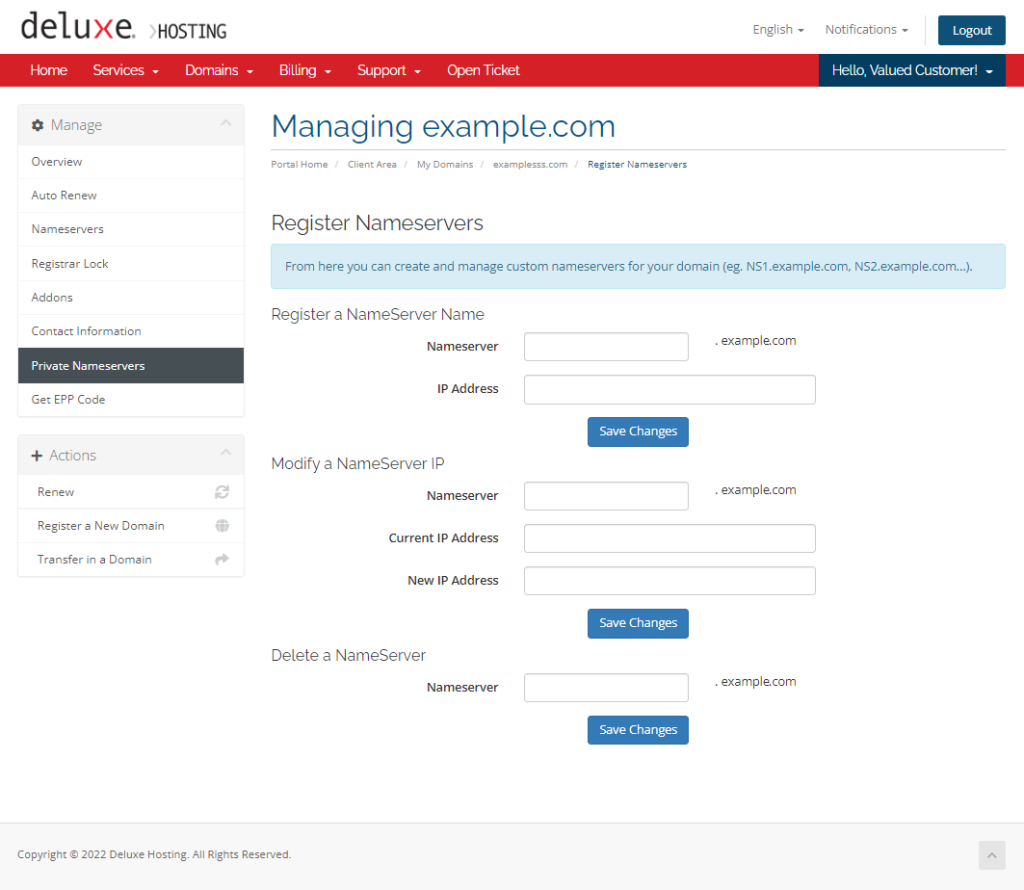
Now that you are on your domains management page, you will see Private Nameservers in the Manage menu on the left-hand side. Select it to start setting up your private name servers.

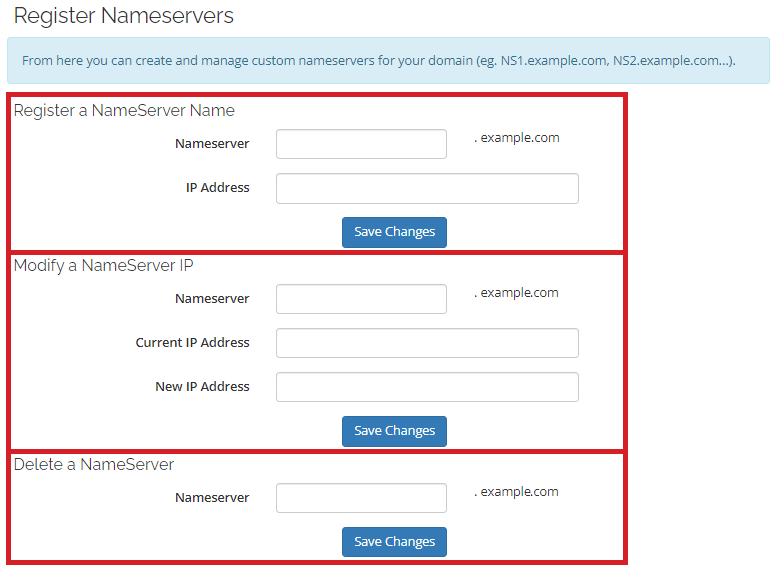
While this page appears to be all one form, it is actually three separate forms. We divided them up in this image to make it easier to visualize.
In the Register a NameServer Name section, you can enter the name servers name (like ns1 or ns2) and the corresponding IP addresses.
The Modify a NameServer IP, you can change the set IP address for a previously set custom name server.
You can delete currently set up custom name servers in the Delete a NameServer section.
Unfortunately, there is no list of currently set up name servers.
Be sure to click the corresponding Save Changes button to update the custom name servers.
If you are still having issues, and need further support, please reach out to our support team using any of these methods.
Recent Articles
What is Cloud Hosting
You probably have heard a lot of buzz around the internet about "the cloud". But what is the cloud that everyone is so excited about, and what does it have to do with your [...]
Website Builder Contact Forms
A Contact Form can be a powerful online tool to help build your business client base and add new customers.
Website Builder Site Settings
Use the Site Settings section of your Website Builder service to customize your new website.
Create your new website with Website Builder
Create your new website for your new business using our new Deluxe Hosting Website Builder service

