Cloud VPS (Virtual Private Server)
Cloud VPS hosting gives you all of the benefits of cloud computing with the customization options of a VPS. Here is how to purchase and set up your own Cloud VPS.
What is Cloud VPS?
As we discussed in this article, cloud web hosting services have several advantages over traditional hosting services, with the main advantage being scalability. But what are the differences between Cloud VPS and traditional VPS service?
You may have guessed it, but the difference is the power of the cloud. Having your VPS in the cloud gives you performance, reliability and scalability that traditional VPS services cannot match. Cloud VPS can handle temporary high loads, mechanical server issues and even data center outages without the end user even noticing.
How to purchase Cloud VPS
If you decide that Cloud VPS is what your new business site needs, you can purchase if from your Deluxe Hosting client area.
If you do not know how to access your client area, you can find out here.
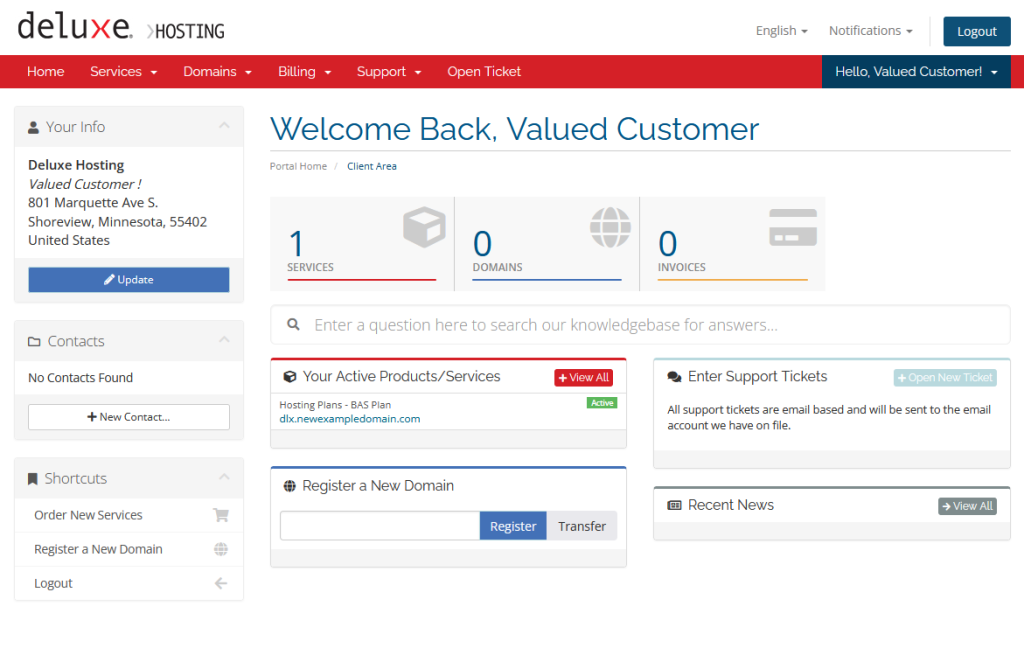
Once logged into your client area, click on Order New Services in the Shortcuts menu in the bottom left-hand side.
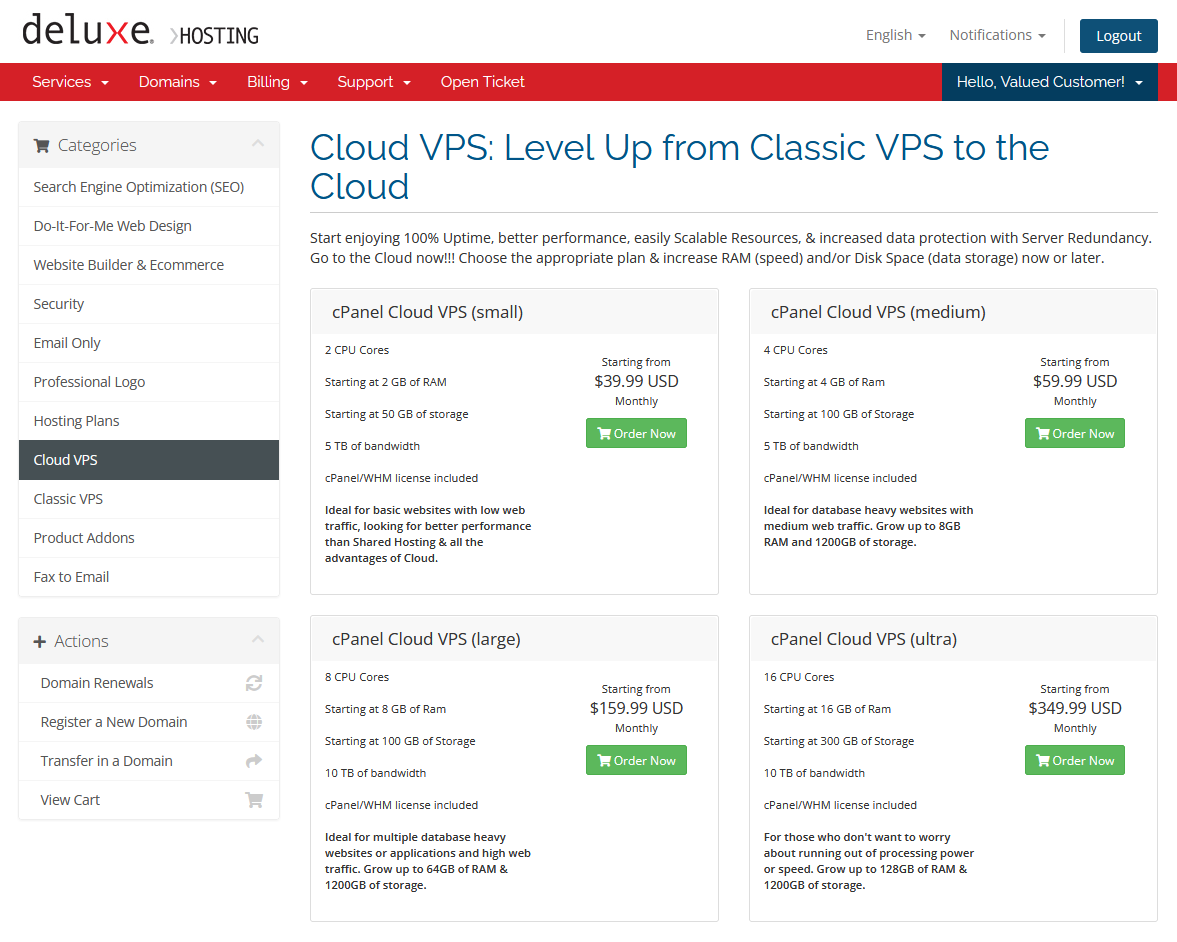
You will now see all of the Cloud VPS options available for purchase. These packages are all hosted on our Cloud, but the starting resources and CPUs are different. Choose the plan the will work best for you.
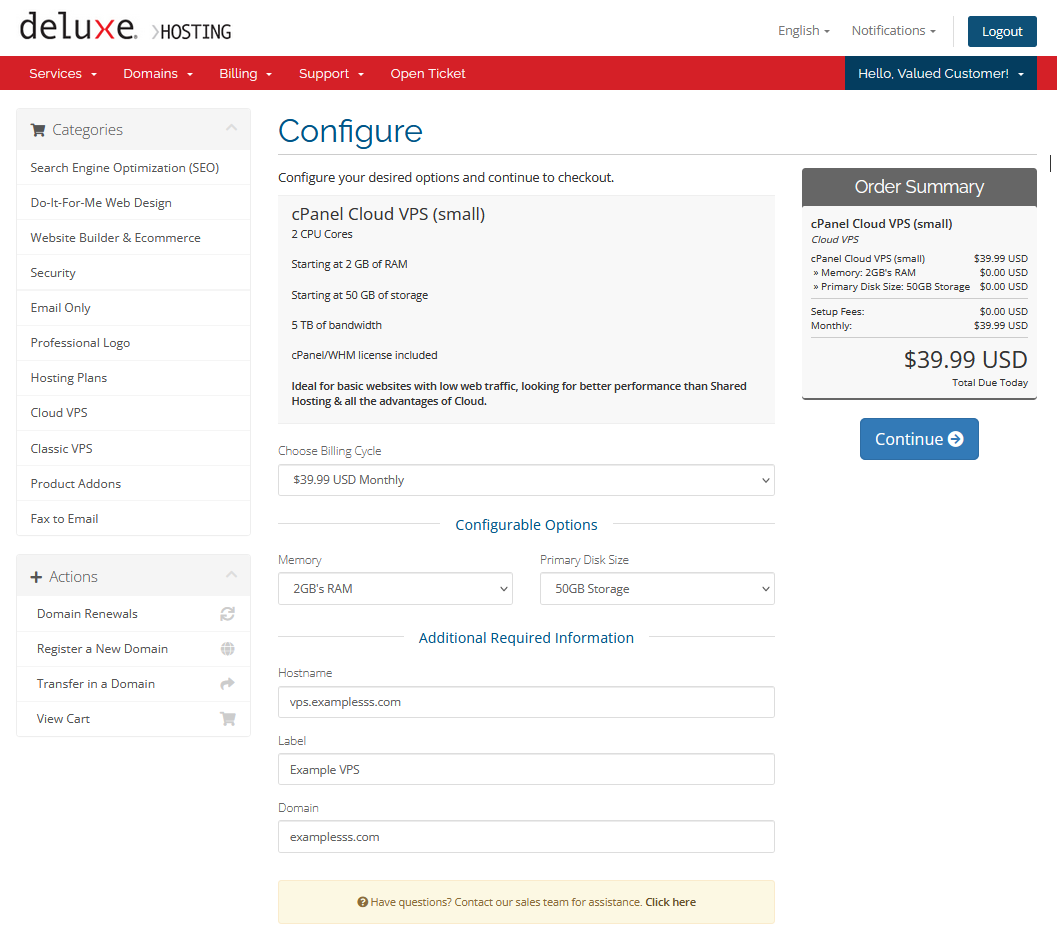
First, you will need to enter your configuration options. Choose the billing cycle, your RAM and storage options. Next, you will need to enter a host name, label and domain name for your service. The host name should be a subdomain of your domain name. The label can we whatever you wish.
Once satisfied, click on the Continue button.
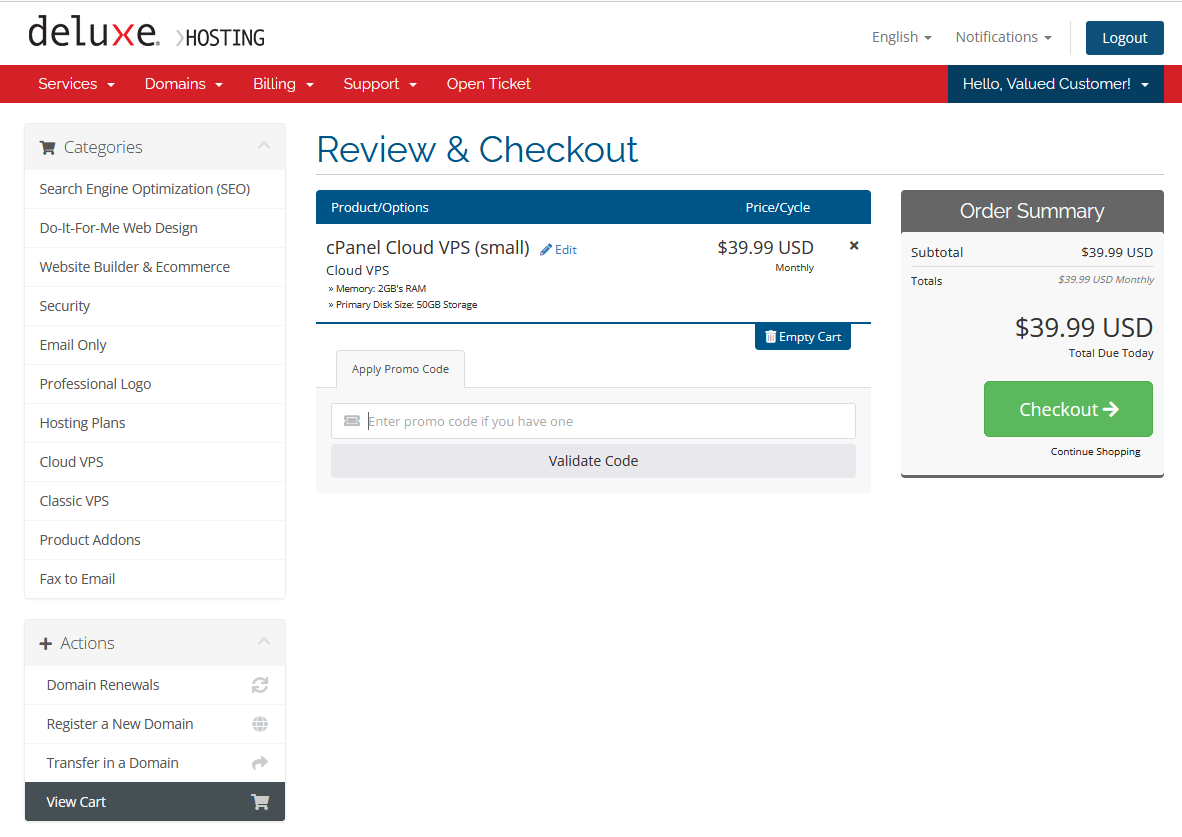
Review your order and then click on Checkout when you are ready.
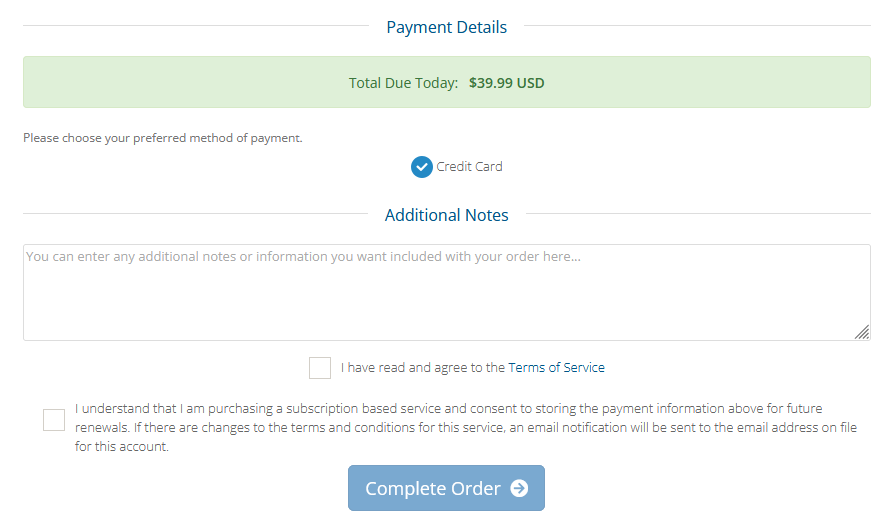
Once you have entered any additional notes, check the boxes that shows that you have read and agreed to the Terms of Service and that you understand that this is a subscription service, click on the Complete Order button to purchase your new Cloud VPS.
Once the order is accepted, you will receive an invoice for your new service. Log into your client area and process the new invoice. Once processed, the cloud will start creating your new Cloud VPS. You can check the status of our Cloud in your client area in your My Services section. More on that below.
Managing your new Cloud VPS
Congratulations! You now have a new Cloud VPS service. Once your new Could VPS is built, you will be able to begin setting you and using your new service.
You are able to manage many of the server side functions from your client area
If you do not know how to access your client area, you can find out here.

Once you access your client area, proceed to your My Services section, either by clicking on the Service block in the center of you home page, or choosing My Services from the Services drop down menu at the top of the screen.
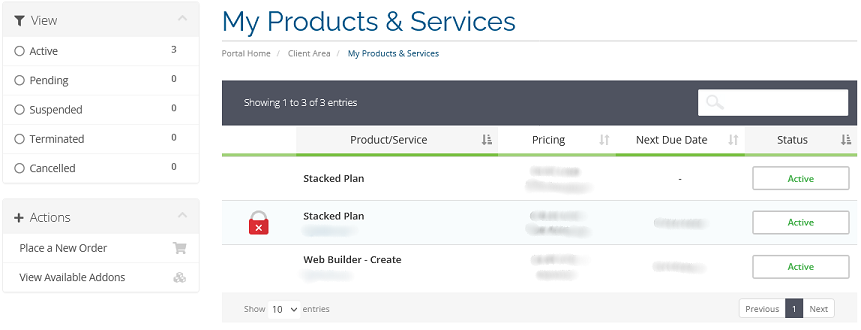
Click on your Cloud VPS service to access that service’s management page.
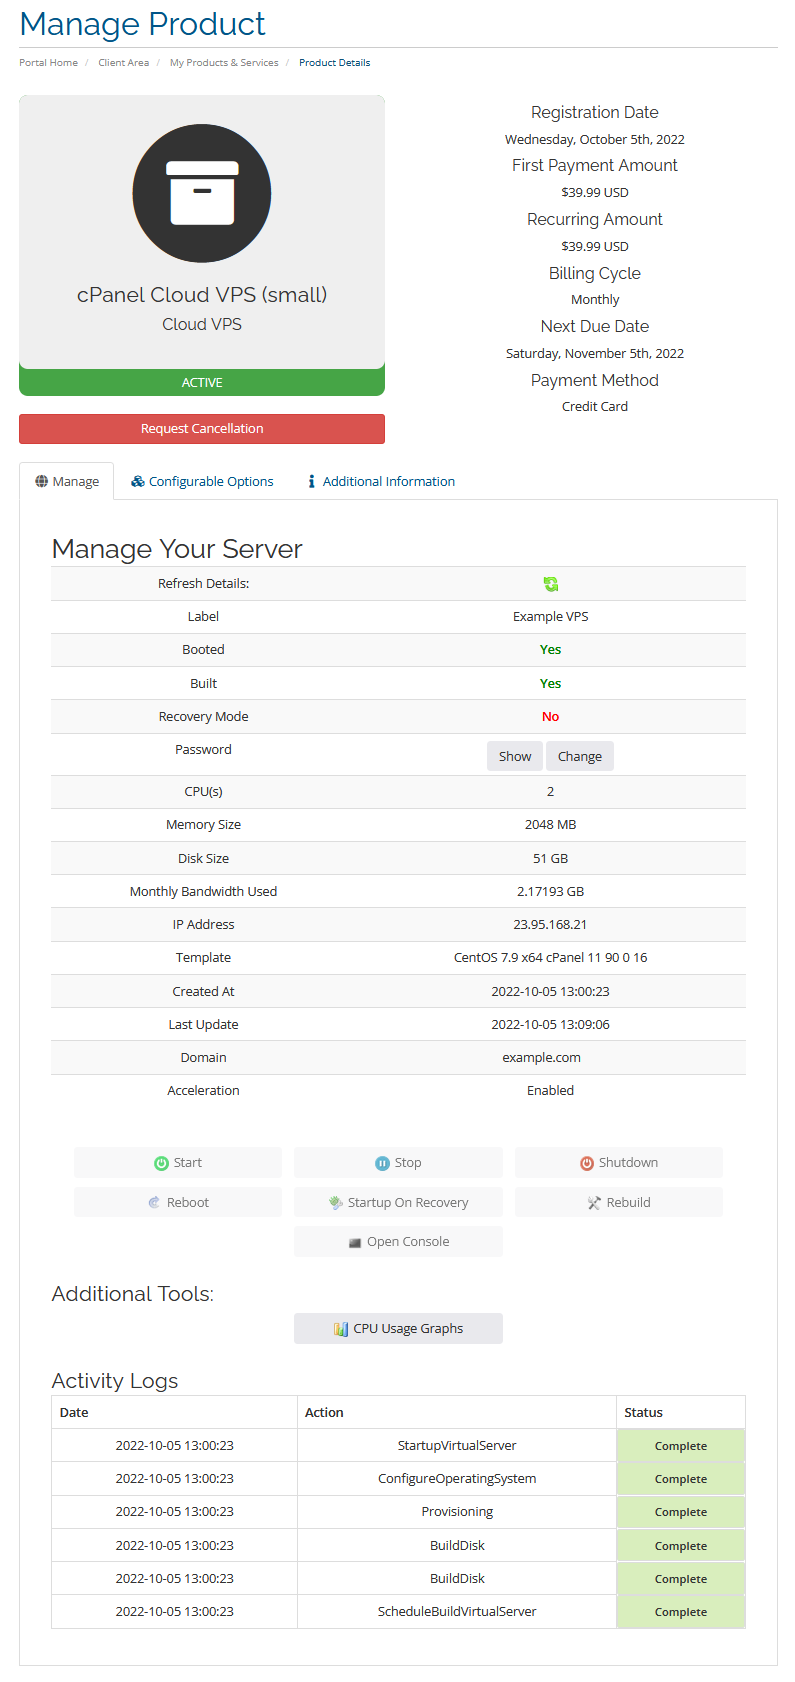
This page will give you a summery of how your Cloud VPS service is configured, as well as live data on how much resources it is using. You will also see your billing information. Below this information, there are three tabs that contain tools to help manage your service.
We will go over these options below.
Here you will see your current host name and domain name. This information is not changeable here.
Management Options
As mentioned above, you can manage many aspects of your Cloud VPS from your client area.
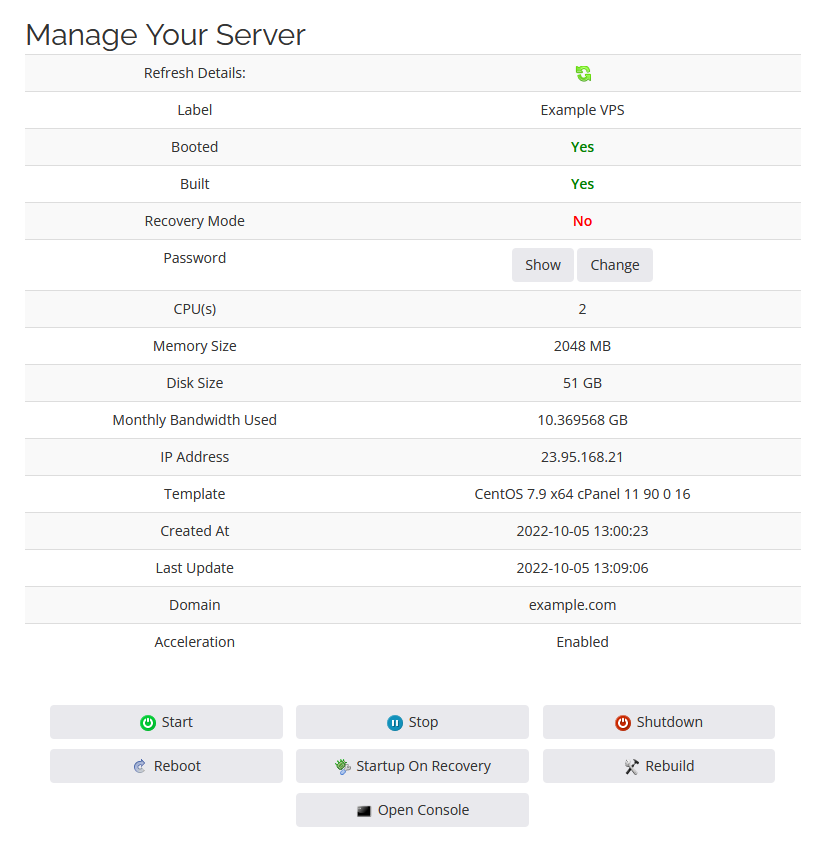
This section contains most of your server stats and options, as well as several tools for managing your server.
| Item | Description |
|---|---|
| Refresh Details | Click to refresh the data below |
| Label | The label that was created during set up |
| Built | Shows if the server is built |
| Recovery Mode | Is the server currently in Recovery Mode |
| Password | Click to either Show your root password, or Change it |
| CPU(s) | Your current number of CPU cores |
| Memory Size | The current RAM allocated to your server |
| Disk Size | Your total disk storage |
| Monthly Bandwidth Used | How much bandwidth you have used |
| IP Address | Your server IP address |
| Template | The template used when building your server (OS) |
| Created At | The date the service was created |
| Last Update | When the server was last updated |
| Domain | Your server domain name |
| Acceleration | Shows if Acceleration is active |
Server Control Buttons
You will also see several server management buttons. You can use these to start, stop or reboot your Cloud VPS.
Activity Log
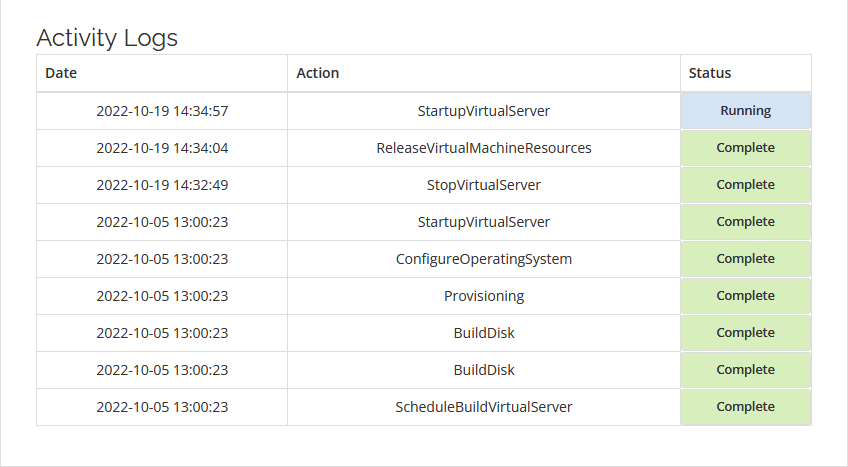
Finally, at the bottom of the page, you will find the Activity Log. Here you will see a list with the last few operations performed by your server, such as startups, stop, shutdowns and reboots.
You will see a timestamp for each item, as well as a status, such as Pending, Running, Complete or Failed.
If you are still having issues, and need further support, please reach out to our support team using any of these methods.
Recent Articles
What is Cloud Hosting
You probably have heard a lot of buzz around the internet about "the cloud". But what is the cloud that everyone is so excited about, and what does it have to do with your [...]
Website Builder Contact Forms
A Contact Form can be a powerful online tool to help build your business client base and add new customers.
Website Builder Site Settings
Use the Site Settings section of your Website Builder service to customize your new website.
Create your new website with Website Builder
Create your new website for your new business using our new Deluxe Hosting Website Builder service

